Are you a team member in a veterinary practice?
Are you a pet parent planning a trip with your furry pal?
Health Certificate for Export Australia Guide
You've booked the move, chosen the airline, and started wondering whether your dog's favourite blanket will fit in the crate. Then someone mentions an export health certificate, and suddenly the travel plan feels less like a holiday and more like a very serious game of fetch with paperwork.
The good news is that the process becomes much easier once you understand the timing. A health certificate for export from Australia isn't a form you can arrange at the last minute. It's the final document in a chain of microchip checks, tests, treatments, examinations, government review, and destination-country requirements. The last few days are especially important, because the final veterinary examination, permit issue, and flight departure need to line up closely.
Understanding the Australian Pet Export Process
An Australian export health certificate is best understood as a last-mile compliance document. It confirms that your cat or dog has been prepared for the destination country and meets Australian export requirements. A departmental veterinary officer issues the export permit and health certificate only after the animal has been shown to meet the importing country's conditions and Australian export legislation. Australian government guidance on cats and dogs returning to Australia explains how this final approval fits into the wider export process.
That wider process may include pre-export isolation, blood testing, vaccinations, parasite treatments, identity checks, veterinary examinations, import permits, translations, and instructions from the destination government. The certificate records the outcome of that preparation. It doesn't replace the preparation itself.
Consider a family moving from Melbourne to Europe with a tabby cat and a golden retriever. The owners may have the airline booking and crates ready, but the documents still need to prove that the right animals received the right treatments at the right time. If a microchip number is recorded incorrectly or a treatment falls outside the destination's permitted window, the final certificate may not be issued as planned.
Practical rule: Treat the certificate as the last piece of a chain, not as the first task on your moving checklist.
Why the final document deserves early attention
Pet owners often focus on the flight because it feels tangible. Veterinary teams tend to focus on the examination because that's where they contribute directly. The export certificate connects both sides, and its timing can affect the entire journey.
A useful starting point is to combine official requirements with practical relocation planning. Guidance such as Melbourne pet relocation advice can help owners think through crates, transport arrangements, and the wider move, while this guide to moving to Australia with a pet offers additional context for owners dealing with international pet documentation.
The key mindset is simple: the certificate is evidence that the whole preparation story is consistent. When every record points to the same microchip, animal, treatment date, and destination rule, the final stage is much calmer. When those details are scattered across emails and handwritten notes, the paperwork can become a real cat-astrophe.
Mapping Out the Long-Term Preparation Phase
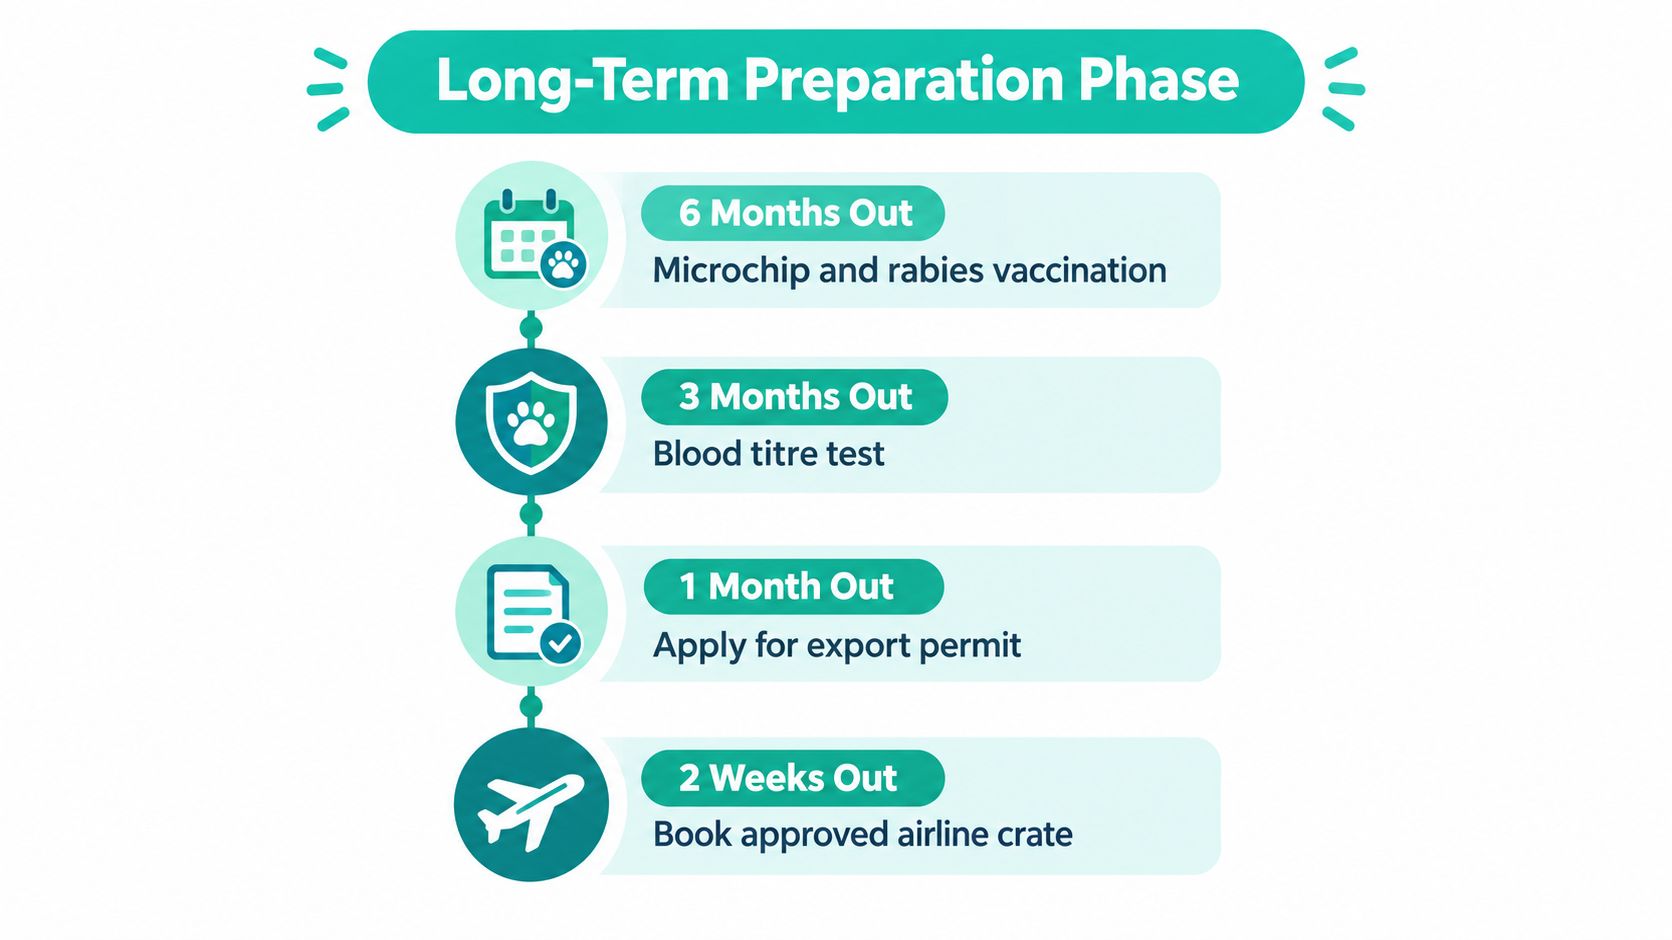
International pet export preparation starts long before the final appointment. Official Australian guidance says preparing a cat or dog for export to Australia can take at least six months, and one department FAQ recommends starting at least seven months before export for category 3 countries. The same guidance notes that an import permit may take up to 123 business days to process. The department's cats and dogs guidance shows why a long runway matters.
Those figures aren't a universal schedule for every route. Destination rules decide whether your pet needs rabies-related preparation, blood testing, isolation, translations, or other steps. The safe approach is to begin early enough that a delayed test or corrected document doesn't push the whole move off course.
Build the record around the microchip
The microchip is the anchor for your pet's identity throughout the process. Australian guidance requires the microchip to be accurately recorded at each test, treatment, and examination step. The department's companion animal export requirements also describes the need to complete destination-country documents, arrange required tests and treatments, and submit the Notice of Intention to Export Live Animals.
A practical preparation sequence looks like this:
Confirm identity first. Ask the veterinary team to scan the microchip and compare the number with every existing record. If the number differs between a vaccination entry, laboratory result, or permit application, resolve that mismatch before moving on.
Map destination conditions. Identify the destination government's requirements for vaccinations, tests, treatments, isolation, import permits, language, and certificate timing. Requirements vary by country, so a certificate that works for one route may not work for another.
Create a date map. Work backwards from the intended departure date. Mark testing windows, treatment windows, the final examination, government appointments, and the airline's document deadline.
Submit the Notice of Intention. The exporter must submit the Notice of Intention to Export Live Animals, other than livestock, at least 10 working days before departure or the start of pre-export isolation, as explained in the official guidance linked above.
The 10-working-day notice is an early administrative checkpoint. It isn't the same as the final certificate appointment, and submitting it doesn't remove the need to complete all destination-specific preparation.
Avoid the short-cut mindset
Booking a flight first and asking questions later usually creates pressure. Airlines, veterinary practices, government officers, laboratories, and pet shippers each control a different part of the timeline. A delay in one area can leave too little room for the others.
Keep one master record with your pet's microchip number, destination, flight details, test results, treatment dates, permit status, and appointment dates. Owners can use this practical overview of international pet travel requirements to understand the kinds of documents that may sit alongside the Australian export certificate.
The preparation phase is long by design. It gives you room to correct an identity error, repeat a test where permitted, or change a booking without putting your pet's travel at risk.
Mastering the 72-Hour Departure Synchronization
The final stage is a timing puzzle with very little room for drift. The registered veterinarian's health and welfare examination must occur within 72 hours of departure, unless the importing country requires a different window. The animal must also leave Australia within 72 hours after the export permit is issued. Australian guidance for preparing cats and dogs for export sets out these timing requirements and explains that some destinations, including the European Union and New Zealand, require an export permit and health certificate.
That means the flight date can't be treated as a separate detail. The appointment, government endorsement, permit issue, and airline handover all need to fit together.
Put the final dates on one shared schedule
A strong workflow gives every participant the same date picture. The owner, pet relocation agency, registered veterinarian, airline, and departmental veterinary officer should know which event depends on which.
Use a simple sequence:
Flight planning: Confirm the intended departure and ask the airline about document cut-off times, crate acceptance, and any route-specific conditions.
Veterinary appointment: Reserve the final health and welfare examination inside the permitted window, while allowing time for the paperwork to reach the departmental veterinary officer.
Government appointment: Arrange the pre-export appointment required before the permit and certificate can be issued.
Permit release: Check when the permit is issued, rather than assuming the application date is the relevant date.
Departure: Make sure the pet can physically leave Australia within the permitted period after permit issue.
Timing insight: The permit issue date can be just as important as the flight date. Don't let a confirmed booking create a false sense of security.
Why timing drift causes trouble
Suppose the final appointment is arranged too early. The certificate may fall outside the destination's accepted examination window. Arrange it too late, and there may be no practical time for corrections, endorsement, or airline document checks. If the permit is issued while the flight is moved, the new departure may no longer fit the required period.
The fix isn't just “book earlier.” It's synchronise the last-mile events. Ask the veterinary practice when the completed certificate will be ready, ask the departmental officer about the endorsement appointment, and ask the airline when documents must be presented. Keep written confirmation of each step.
The flight crate also belongs on this schedule. It must be available for inspection and must meet the airline's requirements. A beautiful crate delivered after the final appointment is still a problem if the airline won't accept it.
Navigating the Final Vet Exam and Paperwork Details
The final examination is more than a general check that your pet looks well. It links the animal in front of the veterinarian to the evidence collected during preparation. The veterinarian must be able to confirm the animal's identity, review the relevant health information, and complete the certificate in the way required for the route.
For dogs and cats exported from Australia, the final clinical examination and health-certificate completion window may be 5 calendar days or 72 hours before export, depending on the destination and route. The crate must meet IATA standards for air consignments. Australian department advice on export health certificates and process controls provides the supporting requirements.

Check the animal and the evidence together
The safest appointment is one where the veterinary team has the complete file, not just the pet's usual clinical notes. Bring the destination requirements, laboratory results, vaccination records, treatment history, permit information, and flight details.
The department highlights several controls that help reduce certificate rejection risk:
Scan the microchip: Scan and record the chip at each intervention, including testing, treatment, and examination.
Confirm vaccinations: Check that every vaccination required by the destination has been completed and recorded correctly.
Review blood samples: Make sure samples were collected within the required destination window and linked to the correct microchip.
Track parasite treatments: Where applicable, internal and external parasite treatments must be applied twice within 45 days before export, as set out in the linked department advice.
Inspect the crate: Confirm that the air-consignment crate meets IATA standards and is suitable for the airline and route.
The phrase “where applicable” matters. Not every destination uses the same treatment schedule, so don't apply a route's requirements to another route without checking.
Complete the certificate cleanly
The veterinary health certificate should be completed in full. Irrelevant fields should be struck through rather than left looking unfinished, and the information should match the supporting records. A missing date, unclear microchip number, or unexplained correction can create questions at the endorsement stage.
A veterinary practice may also need to prepare an import permit, accredited translations, laboratory attachments, or destination-specific declarations. Those documents should be checked as a group, because a technically correct certificate can still travel with an incomplete submission packet.
For owners dealing with another country's endorsement process, this guide to obtaining a USDA-endorsed pet health certificate illustrates why endorsement workflows need their own document checks. The Australian export pathway has its own authorities and rules, but the broader lesson is the same: clean records make final review easier.
Streamlining Compliance with Modern Workflow Tools
A spreadsheet can track a few dates. It becomes much less comfortable when one practice manages multiple pets, destinations, laboratories, airlines, permits, translations, and client questions at the same time. Paper folders and email chains also make it difficult to see which task is waiting for an owner, which document needs a veterinarian, and which deadline depends on a government appointment.
The manual approach still has a place. A small practice handling an occasional straightforward export may prefer a simple checklist and a carefully maintained file. That method works when one person owns the process and everyone updates the same records. It breaks down when information is copied between systems or when several staff members work on one application.
Manual records versus connected workflows
Manual paper chase | Cloud-based workflow |
|---|---|
Dates sit in separate calendars and emails | Tasks are organised around the pet and travel date |
Staff retype microchip and owner details | Reusable records reduce repeated entry |
Missing documents are found during a late review | Required items can be flagged earlier |
Clients ask for updates by email | Owners can receive structured progress updates |
A change may require several manual corrections | Teams can update the central application record |
A suitable workflow tool should support destination-specific requirements, document collection, task ownership, reminders, and review history. It shouldn't replace the veterinarian's judgement or the government's approval. It should make the administrative path clearer so the clinical team can focus on the animal and the required certification.
Features such as automatic form filling after prerequisite tasks are complete, document validation, task prioritisation by travel date, and a submission packet for government endorsement can be useful. A shipping label may also be needed where a wet seal is required. The value lies in connecting those actions to the correct pet and destination, rather than treating each form as an isolated file.
What to check before choosing a platform
Ask whether the system records microchip details consistently, shows outstanding owner tasks, supports team permissions, and keeps a clear audit trail. Check how it handles changing destination requirements and whether the practice can communicate with clients without exposing internal notes.
A platform should reduce repeated work, not add another disconnected inbox. For a detailed look at the role of digital records, this overview of pet travel documentation tools is a useful starting point for comparing paper-based processes with more structured workflows.
Your Quick-Reference Export Readiness Checklist
The most reliable export plans work backwards from departure and forwards from the first identity check. Keep the checklist practical, assign each task to a named person, and record the date when it was completed. Your dog won't care whether the file is in a cloud platform or a folder, but the people handling the documents will care very much.
Long-range preparation
Start early: Allow at least six months, and consider a seven-month starting point for destinations and categories that require a longer preparation path, based on official Australian guidance.
Confirm the route: Check the destination government's current rules before booking non-refundable travel.
Verify identity: Scan the microchip and make sure the same number appears on veterinary, laboratory, permit, and treatment records.
Plan tests and treatments: Place each required vaccination, blood sample, parasite treatment, isolation period, and examination on a shared calendar.
Check supporting documents: Identify import permits, translations, declarations, and any airline paperwork required for the route.
Administrative and travel checks
Submit the notice: Send the Notice of Intention to Export Live Animals at least 10 working days before departure or the start of pre-export isolation, as required by Australian guidance.
Confirm the crate: Make sure the crate meets IATA standards and that the airline has accepted the proposed arrangement.
Coordinate the appointments: Align the registered veterinarian's examination with the departmental veterinary appointment and the planned flight.
Review the certificate: Check every field, strike through irrelevant fields, compare all microchip details, and confirm that supporting records agree.
Watch the final window: Complete the final examination within the destination's accepted window, often 5 calendar days or 72 hours before export, and confirm the animal can leave Australia within 72 hours after the permit is issued.
A final document review should happen before the airport, not at the check-in desk. The owner should know who holds the original documents, what the airline needs to see, and which records travel with the pet.
Don't be discouraged by the detail. The process is demanding because several authorities and service providers need the same animal to be identified and prepared consistently. With a clear date map, accurate microchip records, and early communication, the paperwork becomes manageable rather than mysterious.
Passpaw helps veterinary practices and pet travel teams organise international health certificate workflows, validate documents, prioritise tasks by travel date, and keep owners informed. Visit Passpaw to see how a structured workflow can help coordinate the Australian export certificate's final steps.

More articles
From regulatory changes to best practices for veterinarians and pet owners, our resources keep you ahead of the curve.