Are you a team member in a veterinary practice?
Are you a pet parent planning a trip with your furry pal?
Your Paw-some Guide to the USDA Pet Travel Certificate
Planning an adventure with your pet is exciting, but heading overseas means you've got some important paperwork to tackle. The cornerstone of this process is the USDA pet travel certificate, a document that officially confirms your furry friend is healthy and meets all the import rules for your destination country. Think of it as your pet’s passport to the world.
Your Pre-Flight Briefing on Pet Travel Paperwork
Taking a pet on an international trip involves more than just booking a flight and packing their favorite toys. Most countries have strict health rules to prevent the spread of animal diseases. For U.S. travelers, the USDA pet travel certificate is the main way to show you’ve met these requirements. You might also hear it called an international health certificate.
This document is prepared by a specially approved veterinarian and then officially signed off—or endorsed—by the United States Department of Agriculture (USDA). That final USDA stamp is what tells foreign officials that all the health information is verified and good to go.
Who Are the Key Players?
Getting this certificate is a team effort. You’re the project manager, but there are a couple of other key players whose roles you need to understand right from the start. Knowing who does what makes the whole process much less confusing.
Here’s the team that will get your pet ready for their trip:
The USDA-Accredited Veterinarian: This isn't just any vet. They've completed specific federal training and are approved by the USDA to prepare and sign international health certificates.
The USDA Animal and Plant Health Inspection Service (APHIS): This is the government agency that handles the final step. An APHIS Veterinary Services office is responsible for reviewing and endorsing the certificate your vet prepares.
You, the Pet Owner: Your job is to kick everything off, gather all the necessary records, and make sure every deadline is met. Staying organized is your superpower here.
Key Takeaway: The USDA pet travel certificate isn't just a simple note from your vet. It's an official, government-endorsed document that requires careful teamwork between you, a specially accredited veterinarian, and APHIS.
When Is a USDA Certificate Necessary?
You'll almost always need this certificate when your pet is leaving the United States for another country. While every nation has its own specific rules, the vast majority require this exact type of health verification. For instance, traveling to the European Union, Japan, or Australia typically calls for a USDA-endorsed certificate.
It's helpful to distinguish this from other travel forms. For a complete rundown of what you might need, it's worth exploring the different types of travel documents for pets. But for most international trips starting in the U.S., the USDA certificate is a must-have item on your checklist. This guide will walk you through exactly how to get it done, ensuring you're ready for a smooth takeoff.
Checking Your Destination's Pet Travel Rules
Before you even think about booking a vet appointment or filling out a single form, your first job is to figure out exactly what your destination country requires. Every nation has its own rulebook for bringing in animals, and a tiny mistake can cause huge headaches, travel delays, or worse. Getting this step right is the foundation for a smooth trip and a correctly issued USDA pet travel certificate.
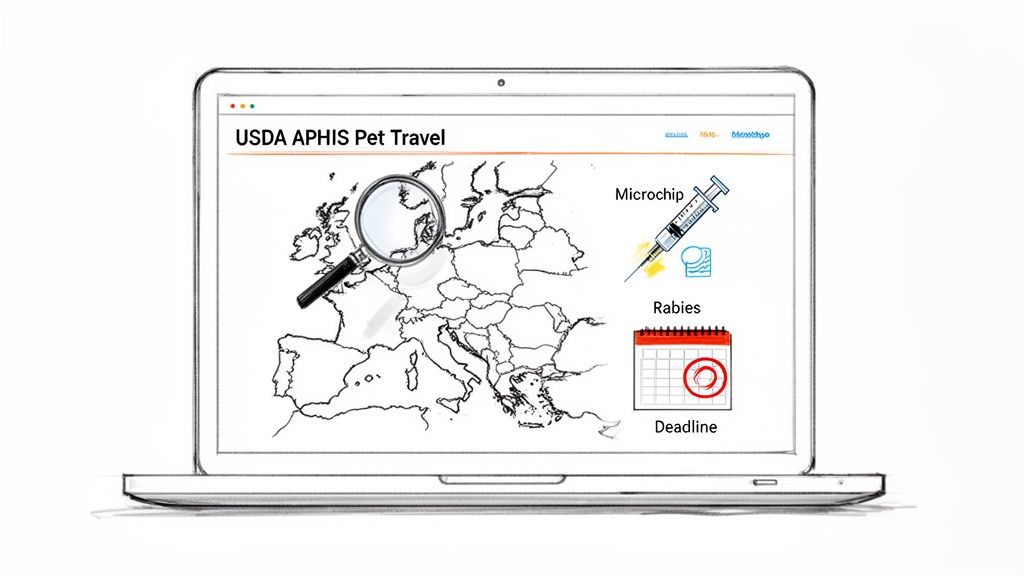
Think of it like this: each country has a unique "entry code" for pets. This code is a precise mix of vaccinations, specific parasite treatments, and sometimes blood tests, all with strict timelines. Your best resource for cracking this code is the USDA APHIS Pet Travel Website. It gives you the official, detailed breakdown for hundreds of destinations.
Using the APHIS Pet Travel Website
Let's be honest, government websites can feel a bit clunky. But in this process, the APHIS site is your most trusted source. It’s designed to give you a clear checklist of requirements based on where you're headed.
When you look up your destination, pay close attention to these details:
Microchip Requirements: Most countries want an ISO-compliant microchip. Importantly, they often specify it must be implanted before the rabies vaccine is given.
Vaccination Timelines: The site will list all required vaccines and—this is key—when they must be given in relation to your travel date.
Blood Titer Tests: Some places, especially rabies-free regions, require a rabies antibody blood test (FAVN test) to show the vaccine is working. These come with long waiting periods, sometimes 3 months or more, after the blood is drawn.
Parasite Treatments: It's common for countries to ask for specific flea, tick, or deworming treatments within a very tight window before your flight.
Pro Tip: Don't just glance at the requirements. Print the page or save it as a PDF. Use a highlighter on key dates and deadlines to build a clear timeline. It’s the best way to prevent any last-minute chaos.
A Real-World Scenario: Traveling to the EU
Let's say you're taking your dog to France. The European Union has a very specific, non-negotiable sequence of events. If you get the order wrong, the entire health certificate may not be valid, even if you completed every single task.
For an EU-bound pet, the process often follows this exact order:
Microchip First: The pet must be implanted with a 15-digit ISO-compliant chip. This is always the first step.
Rabies Vaccination Second: After the microchip is in and has been scanned, the rabies vaccine must be given. A vaccine given before the microchip may not be accepted for travel.
Wait 21 Days: The pet cannot enter the EU for at least 21 days after their primary rabies shot. This period allows their immunity to build.
If a pet owner gets the rabies shot a week before the microchip, they have to start over. That means a new vaccine after the chip is placed, and the 21-day clock restarts from zero. It’s a simple mistake that can delay a trip by almost a month.
Staying Up-to-Date with Changing Rules
International pet travel regulations are anything but static; they can and do change. This growing complexity is a big reason why the global market for pet travel health certificates hit USD 1.14 billion in 2024. As more people travel with their pets, the demand for expert help in navigating these rules keeps climbing. You can read the full market analysis on dataintelo.com for more context.
For a busy veterinary clinic, trying to track these updates for every single country is a massive undertaking. This is where modern software becomes a game-changer by providing real-time regulatory information and automated checklists. It helps clinics stay on top of the most current rules, which drastically cuts down on the risk of human error.
To see a list of destinations and their unique rules, you can explore this overview of Passpaw's supported countries. Taking the time to do your homework is the single best thing you can do to make sure your pet's travel plans go off without a hitch.
Preparing For The Health Certificate Vet Visit
Okay, you've figured out your destination's rules. Now it's time for the most important appointment in this whole process: your visit with a USDA-accredited veterinarian. This isn't just another check-up. This is where the official USDA pet travel certificate is born, and getting it right is a team effort between you and the vet clinic.
Think of this appointment as less of a routine exam and more of a careful documentation session. The goal is to prove your pet's health in a way that meets a foreign government's strict standards. A simple mistake here can cause serious headaches later, so being prepared is your best defense against travel day chaos.
What To Bring To Your Appointment
Walking into the clinic organized is the single best thing you can do. It makes the process smoother for everyone and greatly reduces the chance of errors. Your accredited veterinarian needs very specific information to fill out the health certificate, and you're the one who has it.
Before you go, gather these essentials:
Your Pet’s Complete Medical History: This means vaccination records (especially rabies), details on any parasite treatments, and all the microchip info, including the exact date it was implanted.
Your Travel Itinerary: You'll need the full, exact address where you'll be staying abroad—not just the city. Have your confirmed flight numbers and travel dates handy, too.
The Destination Country's Checklist: Always bring the printed requirements directly from the APHIS website. This helps ensure you and your vet are on the same page, working from the official source.
Having this ready lets your vet team focus on the exam and the precision needed for the paperwork.
The Veterinarian's Role In The Exam
For the veterinary team, this appointment is all about precision. The physical exam is straightforward—confirming the pet is healthy, free of diseases that can be spread, and "fit to fly." The real challenge is the paperwork.
The vet will carefully review every piece of information and record it on the correct form. Sometimes it's the standard APHIS Form 7001, but many countries have their own specific, required forms. Every single field must be filled out perfectly.
A Crucial Detail: One of the most common pitfalls is messing up the timeline. The health certificate has to be signed by the accredited vet within a very tight window, often just 10 days before you travel. There is little wiggle room for mistakes or delays.
To help both sides stay on track, a shared checklist is invaluable. It clarifies who is responsible for what, making sure nothing falls through the cracks.
Health Certificate Appointment Checklist
This checklist helps pet owners and veterinary staff align on responsibilities for a smooth and successful health certificate appointment.
Item/Task | Pet Owner Responsibility | Veterinary Clinic Responsibility |
|---|---|---|
Microchip Verification | Provide microchip number and implantation date. | Scan pet to confirm microchip number and functionality. |
Vaccination Records | Bring complete, original vaccination history (especially rabies). | Verify all vaccine dates meet destination country timelines. |
Travel Details | Provide full destination address and confirmed travel dates. | Accurately transcribe all travel details onto the certificate. |
APHIS Checklist | Print and bring the destination-specific APHIS requirements. | Review checklist to ensure all required tests/treatments are done. |
Contact Information | Provide your full name, phone number, and email. | Record owner's information exactly as it appears on travel docs. |
Pre-filled Forms | If possible, fill out your sections of any forms ahead of time. | Review all pre-filled information for accuracy and completeness. |
Parasite Treatments | Confirm if any tick, flea, or tapeworm treatments are needed. | Administer and document required treatments within the correct timeframe. |
Using a checklist like this turns a potentially chaotic process into a structured, collaborative effort, which is exactly what you want when dealing with international regulations.
Breaking Down The Health Certificate Form
At first glance, an international health certificate can look pretty intimidating with all its official language and boxes. But once you know what to look for, most of them follow a similar pattern. Understanding these key sections will help you double-check the form before you leave the clinic.
You'll almost always find these sections:
Owner and Pet Information: Your full name and destination address, plus your pet's name, species, breed, age, and sex. It all has to be perfect.
Identification: This is for the microchip number. For most international travel, it needs to be a 15-digit, ISO-compliant chip. The number on the form has to match your pet's records down to the last digit.
Vaccination Records: Dates are everything. The rabies vaccine, for example, often has to be given after the microchip was implanted. Every date must be precise. For a deeper dive on this, check out our guide on what vaccines dogs need to fly.
Treatments and Tests: If the country requires specific parasite treatments (like for tapeworms) or blood tests (like a rabies titer), the results and administration dates are recorded here.
Veterinarian’s Statement: This is where the accredited vet signs off, officially stating the pet's health and the accuracy of all the information on the form.
A single typo in a microchip number or a smudged date can make the entire document unusable. It is extremely important for both you and the vet team to review the completed form together, line by line, before it's considered final. That extra two minutes of proofreading can save you from a world of stress.
How to Get Your Certificate USDA Endorsed
When your USDA-accredited veterinarian signs the final line on that health certificate, you’re almost across the finish line. The next step is getting the USDA’s official stamp—the endorsement—which turns your vet’s document into a globally recognized travel pass.
Most countries won’t let your pet through customs without this seal. You’re so close. Let’s make sure the final steps happen without a hitch.
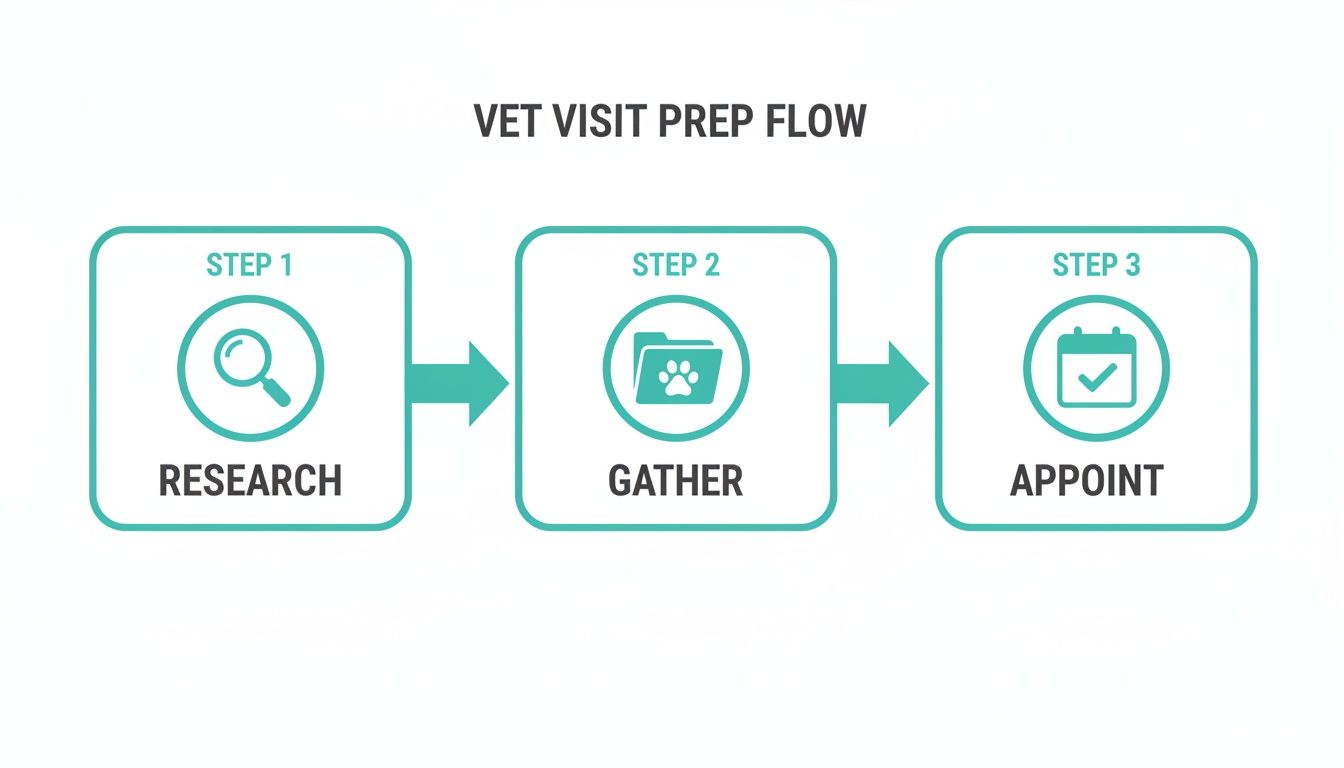
This graphic breaks prep into three phases: research destination rules, gather every required form, then lock in your vet appointment.
Choosing Your Endorsement Path
You can submit your pet’s health certificate in one of two ways: online through the Veterinary Export Health Certification System (VEHCS) or by mailing the original paperwork. Your choice will depend on timing, cost, and how comfortable your clinic is with federal websites.
Veterinary Export Health Certification System (VEHCS)
Pros: Turnaround in 1–3 business days, no risk of postal delays, and a clear digital trail.
Cons: The clinic must be enrolled in VEHCS and familiar with the USDA platform.
Mail-In Service
Pros: Simple—just package the signed certificate and ship it to your regional APHIS office.
Cons: Allow at least 7–10 business days for two-way shipping plus USDA processing.
Expert Insight: Whenever possible, lean toward VEHCS. When you’re racing against a 10-day endorsement window, instant submissions can save your trip.
Understanding USDA Endorsement Fees
Budgeting for endorsement fees often catches pet owners by surprise. Here’s what you might expect:
Base Cost: Recent updates put the fee around USD 101.
Additional Reviews: Lab reports (rabies titers, etc.) can push totals to USD 173 or higher.
Stay Updated: APHIS can adjust these numbers, so check the official fee schedule before you finalize your travel budget.
Nailing the Endorsement Timing
Timing is everything. Most destinations require USDA endorsement within 10 days of arrival. Too early or too late, and you risk quarantine—or a delayed flight.
Task | Timing |
|---|---|
Vet exam & certificate completion | Day 1 |
VEHCS upload (if digital) | Day 1 or 2 |
USDA review & endorsement | Days 3–5 |
Travel with endorsed certificate | Day 10 |
Mailed submissions need more buffer time: overnight both ways plus USDA processing. That’s why the online route is often your safest bet. For a step-by-step breakdown and printable checklists, see our comprehensive guide on how to get a USDA-endorsed pet health certificate.
Sidestepping Common Pitfalls
Even the sharpest traveler can hit a patch of turbulence when dealing with USDA pet travel paperwork. The rules are frustratingly strict, the timelines are tight, and one small slip-up can ground your plans. Let's walk through the most common mistakes we see so you can confidently avoid them.
Think of this as your pre-flight safety check for the paperwork part of your journey. Knowing what can go wrong is the best way to make sure everything goes right.
Miscalculating The 10-Day Health Exam Window
This is, without a doubt, one of the most frequent and costly mistakes. Most countries require the accredited veterinarian to examine your pet and sign the health certificate within 10 days of arrival. This isn't a suggestion; it's a hard deadline.
Imagine you have a flight to Italy on June 20th. It’s easy to assume you can get the exam done on June 10th and be fine. But what if your flight is overnight and lands on June 21st? Your certificate could expire while you're literally in the air. You absolutely must calculate the window based on your arrival date and time, not when you leave.
How to get it right:
Confirm your arrival time and date. This is the anchor for your entire timeline.
Book your vet appointment smartly. Don't push it to the last minute. Aim for the middle of that 10-day window, maybe 5-7 days before arrival. This builds in a crucial buffer in case of unexpected delays with the USDA endorsement.
Using a Vet Who Isn't USDA-Accredited
It’s a heart-sinking moment: you get your pet's health certificate, send it off, and get a rejection notice from the USDA. This often happens because the signing veterinarian wasn't officially USDA-accredited. Your family vet might be amazing with your pet, but if they haven’t completed the specific federal training, their signature is not valid for international travel.
For example, a family planning a move to Japan might go to their trusted local clinic. If that vet isn't accredited, the entire form is useless. They have to start from scratch with a new vet and a new exam, putting their tight travel timeline in serious jeopardy.
Crucial Tip: Before you book the health certificate appointment, ask the clinic point-blank: "Is the veterinarian who will be signing the forms USDA-accredited for international health certificates?" Don't be shy—this one question can prevent a massive headache.
Submitting Sloppy or Incomplete Paperwork
When it comes to government paperwork, neatness counts. APHIS officials review hundreds of these documents a day. Anything that is incomplete, hard to read, or uses correction fluid (like White-Out) will almost certainly be rejected. A smudged date, an unreadable microchip number, or a single missed signature can bring the entire process to a halt.
Picture this: a vet's handwriting for the rabies vaccine lot number is a bit unclear. The USDA official can't verify it, so they reject the certificate. Now you've lost precious days in your 10-day window and have to rush back to the vet to get it fixed and resubmitted.
Here's how to ensure your forms are pristine:
Fill out forms digitally whenever possible. This completely eliminates handwriting issues.
Use blue ink for signatures. Many countries prefer it to easily distinguish original documents from copies.
Triple-check everything before you leave the vet. Seriously. Sit down with the vet tech and review every single field. Are the names spelled correctly? Are the dates right? Does the microchip number match? One last look can save you days of stress.
Finding a Typo After You've Left the Clinic
So you get home and notice a small typo—your destination address is off by one digit. It seems so minor, but any inaccuracy could invalidate the certificate. The absolute worst thing you can do is try to fix it yourself.
Changing a signed, official document is a huge red flag and will likely result in a rejection. Your only move is to contact the accredited veterinarian immediately. They will need to issue a corrected document. This is exactly why building a few buffer days into your timeline is so important. It creates a safety net for fixing these little human errors without throwing your entire trip into chaos. It’s a pain, but it's the only way to keep your journey on track.
Your Top Pet Travel Certificate Questions, Answered
Let's be honest, navigating the world of pet travel paperwork can feel like learning a new language. The rules are specific, the timelines are tight, and it's completely normal to have a few questions. To clear things up, we've put together simple answers to the most common questions we hear from pet owners and veterinary teams alike.
Think of this as your go-to cheat sheet for a stress-free journey.
How Long Is a USDA Pet Travel Certificate Good For?
This is one of the most critical—and often misunderstood—parts of the process. A USDA-endorsed pet health certificate has a very short shelf life. For most countries, the entire process, from your vet's final exam to the USDA's official stamp, must be completed within 10 days of your pet's arrival.
That 10-day window is not flexible. It's designed to give the destination country confidence that your pet's health status is current. Always, always count backward from your arrival date, not your departure date. This is especially important for long-haul flights that cross the international date line.
What's the Difference Between a CVI and an International Health Certificate?
You'll hear these terms thrown around, but they aren't the same thing. Knowing which one you need is key.
A Certificate of Veterinary Inspection (CVI) is your standard domestic health certificate. It's what you'd use for travel within the United States, like driving from California to New York.
An International Health Certificate is a specific, often multi-page document needed for travel outside the United States. This is the one that needs the final seal of approval—the official endorsement—from the USDA.
Using a CVI for an international flight is a guaranteed way to have your pet denied entry. They serve completely different purposes.
Key Takeaway: If you're leaving the U.S., you need an official international health certificate with a USDA endorsement. A standard CVI just won't cut it for crossing international borders.
Do I Really Need a USDA Certificate for Hawaii?
This is a great question because traveling to Hawaii with a pet feels like going to another country. While Hawaii is a U.S. state, it has its own unique and very strict process to protect its rabies-free status.
The short answer is no, you do not need a formal USDA endorsement like you would for a trip to Europe. However, you absolutely need a health certificate and all supporting documents issued by a veterinarian. The process involves specific rabies vaccination timelines, a blood test, and sending the documents directly to Hawaii's quarantine officials, completely bypassing the USDA APHIS office.
How Much Time Should I Block Out for This Whole Process?
Start yesterday. Seriously, the moment you even think about traveling with your pet, start looking into the requirements. The timeline varies wildly depending on your destination.
For countries with simpler rules: You can often get everything squared away in 1-2 months.
For rabies-free countries (think Japan, Australia, New Zealand): The process can easily take 6 months or even longer. These destinations require rabies titer blood tests followed by mandatory waiting periods.
Giving yourself a generous head start is the best way to handle any unexpected hiccups—like a delayed lab result or a paperwork revision—without the last-minute panic.
Managing the fine print of pet travel can be a lot, but you don't have to tackle it alone. Passpaw gives veterinary teams the tools to automate the creation and validation of international health certificates, making sure every detail is right and every deadline is met. Discover how Passpaw makes global pet travel simpler for everyone.

More articles
From regulatory changes to best practices for veterinarians and pet owners, our resources keep you ahead of the curve.


